Difference between revisions of "Database/Map/Server"
Jump to navigation
Jump to search
| Line 4: | Line 4: | ||
Lets set up our map server with local cached image files | Lets set up our map server with local cached image files | ||
| − | # [http://elinux.org/RPi_Nginx_Webserver install Nginx] | + | # Install nginx (server), hostapd (wifi AP host), dnsmasq (light dns server) |
| + | [http://elinux.org/RPi_Nginx_Webserver install Nginx] | ||
<nowiki> | <nowiki> | ||
sudo apt-get update | sudo apt-get update | ||
sudo apt-get install nginx | sudo apt-get install nginx | ||
| + | sudo apt-get install hostapd | ||
| + | sudo apt-get install dnsmasq | ||
sudo service nginx start | sudo service nginx start | ||
</nowiki> | </nowiki> | ||
| Line 17: | Line 20: | ||
# Set up AP with hostap (instructions from [http://elinux.org/RPI-Wireless-Hotspot set up AP with udhcpd]) | # Set up AP with hostap (instructions from [http://elinux.org/RPI-Wireless-Hotspot set up AP with udhcpd]) | ||
| − | |||
| − | |||
| − | |||
edit the file /etc/hostapd/hostapd.conf | edit the file /etc/hostapd/hostapd.conf | ||
<nowiki> | <nowiki> | ||
| Line 58: | Line 58: | ||
netmask 255.255.255.0 | netmask 255.255.255.0 | ||
</nowiki> | </nowiki> | ||
| − | # | + | # configure dnsmasq /etc/dnsmasq.conf |
<nowiki> | <nowiki> | ||
# captive portal to this | # captive portal to this | ||
Revision as of 14:08, 11 April 2016
RPi side
Lets set up our map server with local cached image files
- Install nginx (server), hostapd (wifi AP host), dnsmasq (light dns server)
sudo apt-get update
sudo apt-get install nginx
sudo apt-get install hostapd
sudo apt-get install dnsmasq
sudo service nginx start
- Make a link to /var/www to make things easier
sudo ln -s /var/www /home/USER/code
- Set up AP with hostap (instructions from set up AP with udhcpd)
edit the file /etc/hostapd/hostapd.conf
interface=wlan0
ssid=TacticalSpaceLab
hw_mode=g
channel=6
auth_algs=1
wmm_enabled=0
Edit the file /etc/default/hostapd and change the line:
#DAEMON_CONF=""
to
DAEMON_CONF="/etc/hostapd/hostapd.conf"
Start it up, and add it to start at boot
sudo service hostapd start
sudo update-rc.d hostapd enable
sudo service hostapd start
- Set up /etc/network/interfaces for serving DHCP and DNS
auto eth0
iface eth0 inet static
address 10.1.2.1
netmask 255.255.255.0

iface wlan0 inet static
address 10.1.2.2
netmask 255.255.255.0
- configure dnsmasq /etc/dnsmasq.conf
# captive portal to this
address=/#/10.1.2.1
interface=eth0
dhcp-range=10.1.2.5,12h
- restart dnsmasq
sudo /etc/init.d/dnsmasq restart
- if you want dnsmarsq script logging...
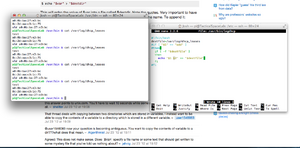
Create /var/log/dhcp_leases file with write create /usr/bin/logdhcp, make executable add it to dnsmasq config
#!/bin/bash
destfile=/var/log/dhcp_leases
#if [ "$1" == "add" ]
#then
  if [ -f "$destfile" ]
  then
    echo "$1 $2" >> "$destfile"
  fi
#fi
ended up using dnsmasq for DNS and DHCP. Setting DNS forward IP to local for captive portal setup
- place javascript files and map tiles into /var/www
Remember to make all /var/www/ folders readable with:
sudo find /var/www -type d -exec chmod a+x {} +
and possibly
sudo find /var/www -type d -exec chown {} root:root +


