Raspberry Pi setup
Before you can do anything, you need to configure the Wifi on the Pi (NB: default Pi login is 'pi' and default password is 'raspberry')
The setting up a headless Pi instructions here (in particular Step 3) worked for us, although we only needed ssid and psk (password) for the network={... step.
Lets set up our map server with local cached image files
Installing required software
Install nginx (server), hostapd (wifi AP host), dnsmasq (light dns server) install Nginx
sudo apt-get update
sudo apt-get install nginx -y
sudo apt-get install hostapd -y
sudo apt-get install dnsmasq -y
Web Server
Set up web server to forward 404's to root directory (needed for captive portal behaviour) and start edit /etc/nginx/sites-available/default
and modify line in "location / {" section:
try_files $uri $uri/ = 404;
becomes
try_files $uri $uri/ /index.html;
Now start the server
sudo service nginx start
Set up hostapd
Set up AP with hostap (instructions from set up AP with udhcpd) edit the file /etc/hostapd/hostapd.conf
interface=wlan0
ssid=TacticalSpaceLab
hw_mode=g
channel=6
auth_algs=1
wmm_enabled=0
Edit the file /etc/default/hostapd and change the line:
#DAEMON_CONF=""
to
DAEMON_CONF="/etc/hostapd/hostapd.conf"
Start it up, and add it to start at boot
sudo service hostapd start
sudo update-rc.d hostapd enable
Note for EDIMAX adaptors
edimax version of hostapd if using an edimax wifi usb
wget http://www.daveconroy.com/wp3/wp-content/uploads/2013/07/hostapd.zip
unzip hostapd.zip
sudo mv /usr/sbin/hostapd /usr/sbin/hostapd.bak
sudo mv hostapd /usr/sbin/hostapd.edimax
sudo ln -sf /usr/sbin/hostapd.edimax /usr/sbin/hostapd
sudo chown root.root /usr/sbin/hostapd
sudo chmod 755 /usr/sbin/hostapd
DHCP and DNS for access point and captive portal
Set up /etc/network/interfaces for serving DHCP and DNS
auto lo
iface lo inet loopback

auto wlan0
iface wlan0 inet static
  address 10.1.2.1
  netmask 255.255.255.0
  network 10.1.2.0
configure dnsmasq /etc/dnsmasq.conf
# captive portal to this
no-resolv
server=/localnet/10.1.2.1
server=/tacticalspace/10.1.2.1
address=/#/10.1.2.1
interface=wlan0
dhcp-range=10.1.2.5,10.1.2.200,12h
restart dnsmasq
sudo /etc/init.d/dnsmasq restart
More Captive Portal Stuff
Forward all IP to the device
Turn on ip forwarding for IPV4
sudo nano /etc/sysctl.conf
uncomment:
net.ipv4.ip_forward = 1
then run the following to set up IP forwarding from iptables conversation for captive portals
sudo iptables -t nat -A PREROUTING -p tcp --dport 80 -j DNAT --to-destination 10.1.2.1:80
sudo iptables -t nat -A POSTROUTING -j MASQUERADE
Some notes about the process of making a captive portal
Pop up page info for IOS, Windows, and Android
Logging people
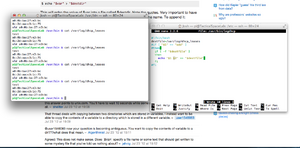
if you want dnsmarsq script logging... Create /var/log/dhcp_leases file with write create /usr/bin/logdhcp, make executable add it to dnsmasq config
#!/bin/bash
destfile=/var/log/dhcp_leases
#if [ "$1" == "add" ]
#then
  if [ -f "$destfile" ]
  then
    echo "$1 $2" >> "$destfile"
  fi
#fi
ended up using dnsmasq for DNS and DHCP. Setting DNS forward IP to local for captive portal setup
Map framework
Copy the server framework files across
The files needed for hosting the map are part of the Open Maps GitHub repository in location "Device Files/www/" Place these file (javascript, example index, map tiles) into /var/www/html
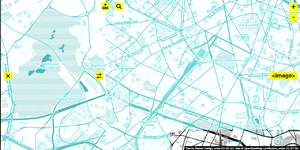
The repository only includes very far-out zoom levels (2,3,4). This older archive has zoom levels down to 18 in the areas around central Paris, Berlin, and Vienna: MQ var directory archive
Remember to make all /var/www/html folders readable with:
sudo find /var/www -type d -exec chmod a+x {} +
sudo find /var/www -type d -exec chmod a+w {} +
sudo find /var/www -type d -exec chown root:root {} +
sudo find /var/www -type f -exec chmod a+r {} +
sudo find /var/www -type f -exec chown root:root {} +
Power saving
If you are using the device for battery-based or power-sensitive installs, follow these instructions for disabling LED and HDMI functionality to save power.
For Map content
MapNik coding platform for maps... pull render tiles using this?
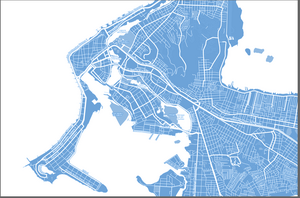
beautiful Stamen Design map that can be used
Everything Script
Run these individually first
sudo -i
apt-get update </dev/null
apt-get -y install nginx hostapd dnsmasq < "/dev/null"
then
sed -i 's/try_files $uri $uri\/ =404;/try_files $uri $uri\/ \/index.html;/g' /etc/nginx/sites-available/default
service nginx start
touch /etc/hostapd/hostapd.conf
echo "interface=wlan0" >> /etc/hostapd/hostapd.conf
echo "ssid=TacticalSpaceLab" >> /etc/hostapd/hostapd.conf
echo "hw_mode=g" >> /etc/hostapd/hostapd.conf
echo "channel=6" >> /etc/hostapd/hostapd.conf
echo "auth_algs=1" >> /etc/hostapd/hostapd.conf
echo "wmm_enabled=0" >> /etc/hostapd/hostapd.conf
sed -i 's/#DAEMON_CONF=""/DAEMON_CONF="\/etc\/hostapd\/hostapd.conf"/g' /etc/default/hostapd
service hostapd start
update-rc.d hostapd enable
wget http://www.daveconroy.com/wp3/wp-content/uploads/2013/07/hostapd.zip
unzip hostapd.zip
mv /usr/sbin/hostapd /usr/sbin/hostapd.bak
mv hostapd /usr/sbin/hostapd.edimax
ln -sf /usr/sbin/hostapd.edimax /usr/sbin/hostapd
chown root.root /usr/sbin/hostapd
chmod 755 /usr/sbin/hostapd
> /etc/network/interfaces
echo "auto lo" >> /etc/network/interfaces
echo "iface lo inet loopback " >> /etc/network/interfaces
echo " " >> /etc/network/interfaces
echo "auto wlan0" >> /etc/network/interfaces
echo "iface wlan0 inet static" >> /etc/network/interfaces
echo "  address 10.1.2.1" >> /etc/network/interfaces
echo "  netmask 255.255.255.0" >> /etc/network/interfaces
echo "  network 10.1.2.0" >> /etc/network/interfaces
> /etc/dnsmasq.conf
echo "# captive portal to this" >> /etc/dnsmasq.conf
echo "no-resolv " >> /etc/dnsmasq.conf
echo "server=/localnet/10.1.2.1" >> /etc/dnsmasq.conf
echo "server=/tacticalspace/10.1.2.1" >> /etc/dnsmasq.conf
echo "address=/#/10.1.2.1" >> /etc/dnsmasq.conf
echo "interface=wlan0" >> /etc/dnsmasq.conf
echo "dhcp-range=10.1.2.5,10.1.2.200,12h" >> /etc/dnsmasq.conf
/etc/init.d/dnsmasq restart
sed -i 's/#net.ipv4.ip_forward=1/net.ipv4.ip_forward=1/g' /etc/sysctl.conf
iptables -t nat -A PREROUTING -p tcp --dport 80 -j DNAT --to-destination 10.1.2.1:80
iptables -t nat -A POSTROUTING -j MASQUERADE
find /var/www -type d -exec chmod a+x {} +
find /var/www -type d -exec chmod a+w {} +
find /var/www -type d -exec chown root:root {} +
find /var/www -type f -exec chmod a+r {} +
find /var/www -type f -exec chown root:root {} +


